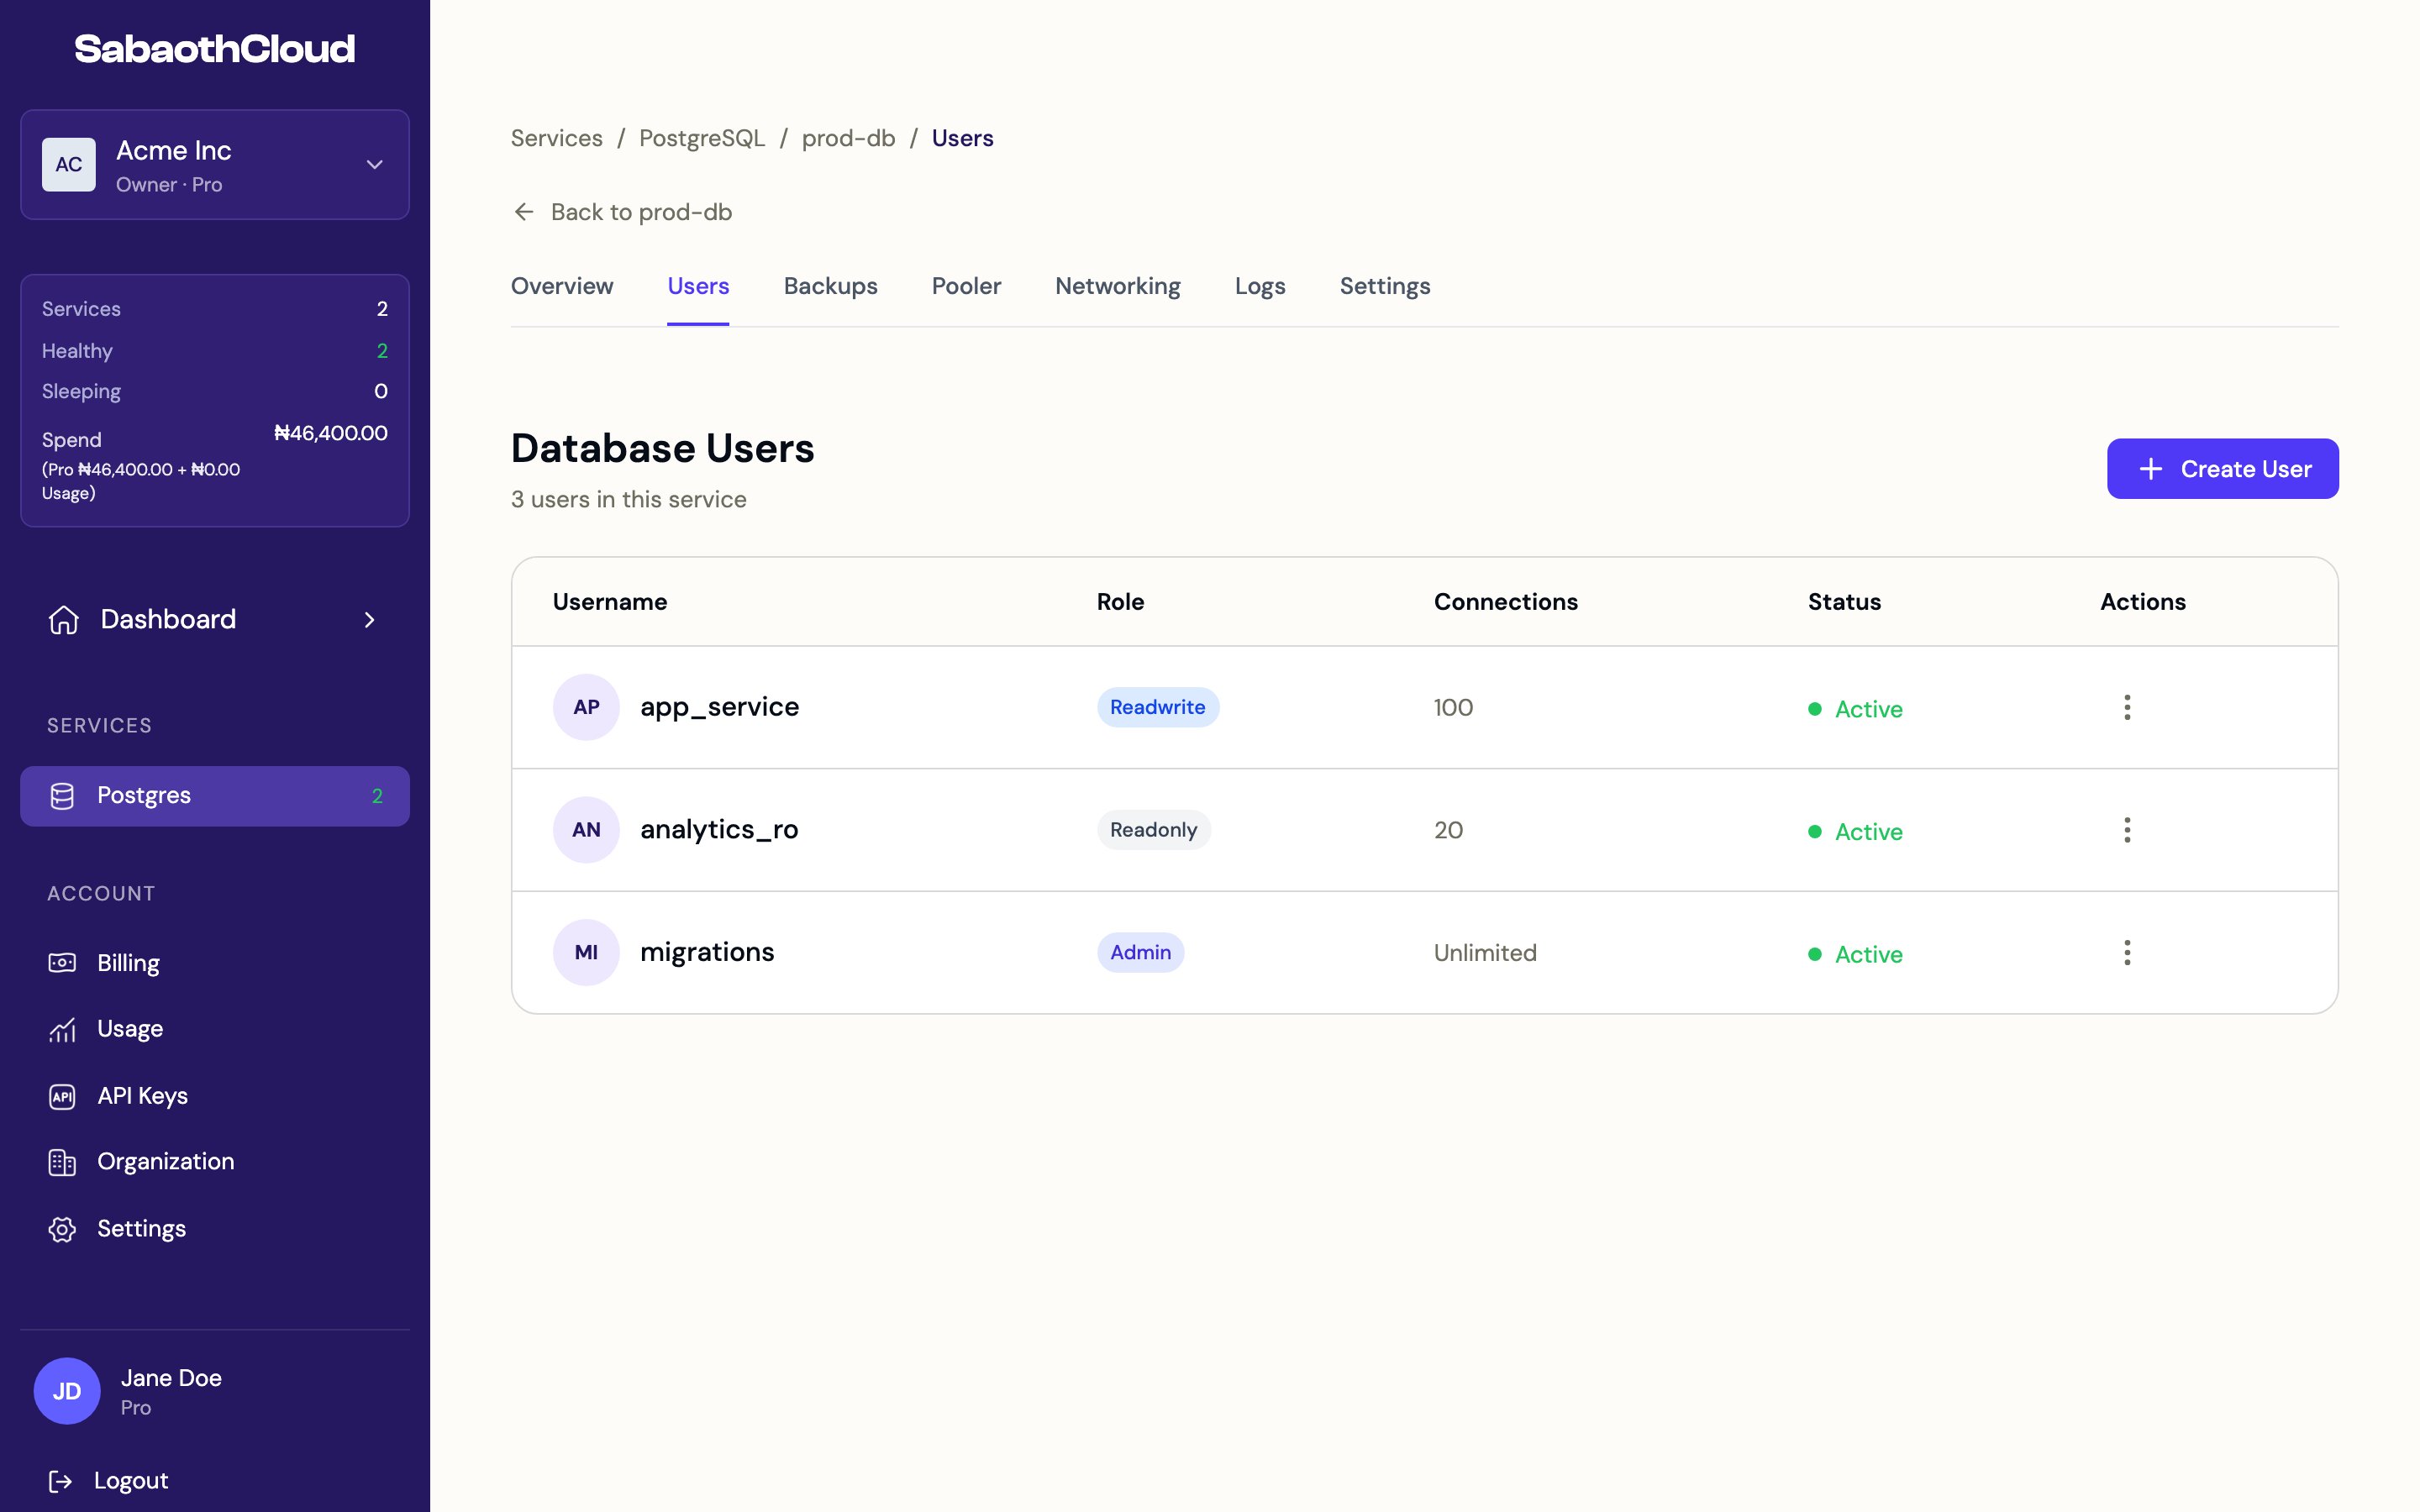
Roles
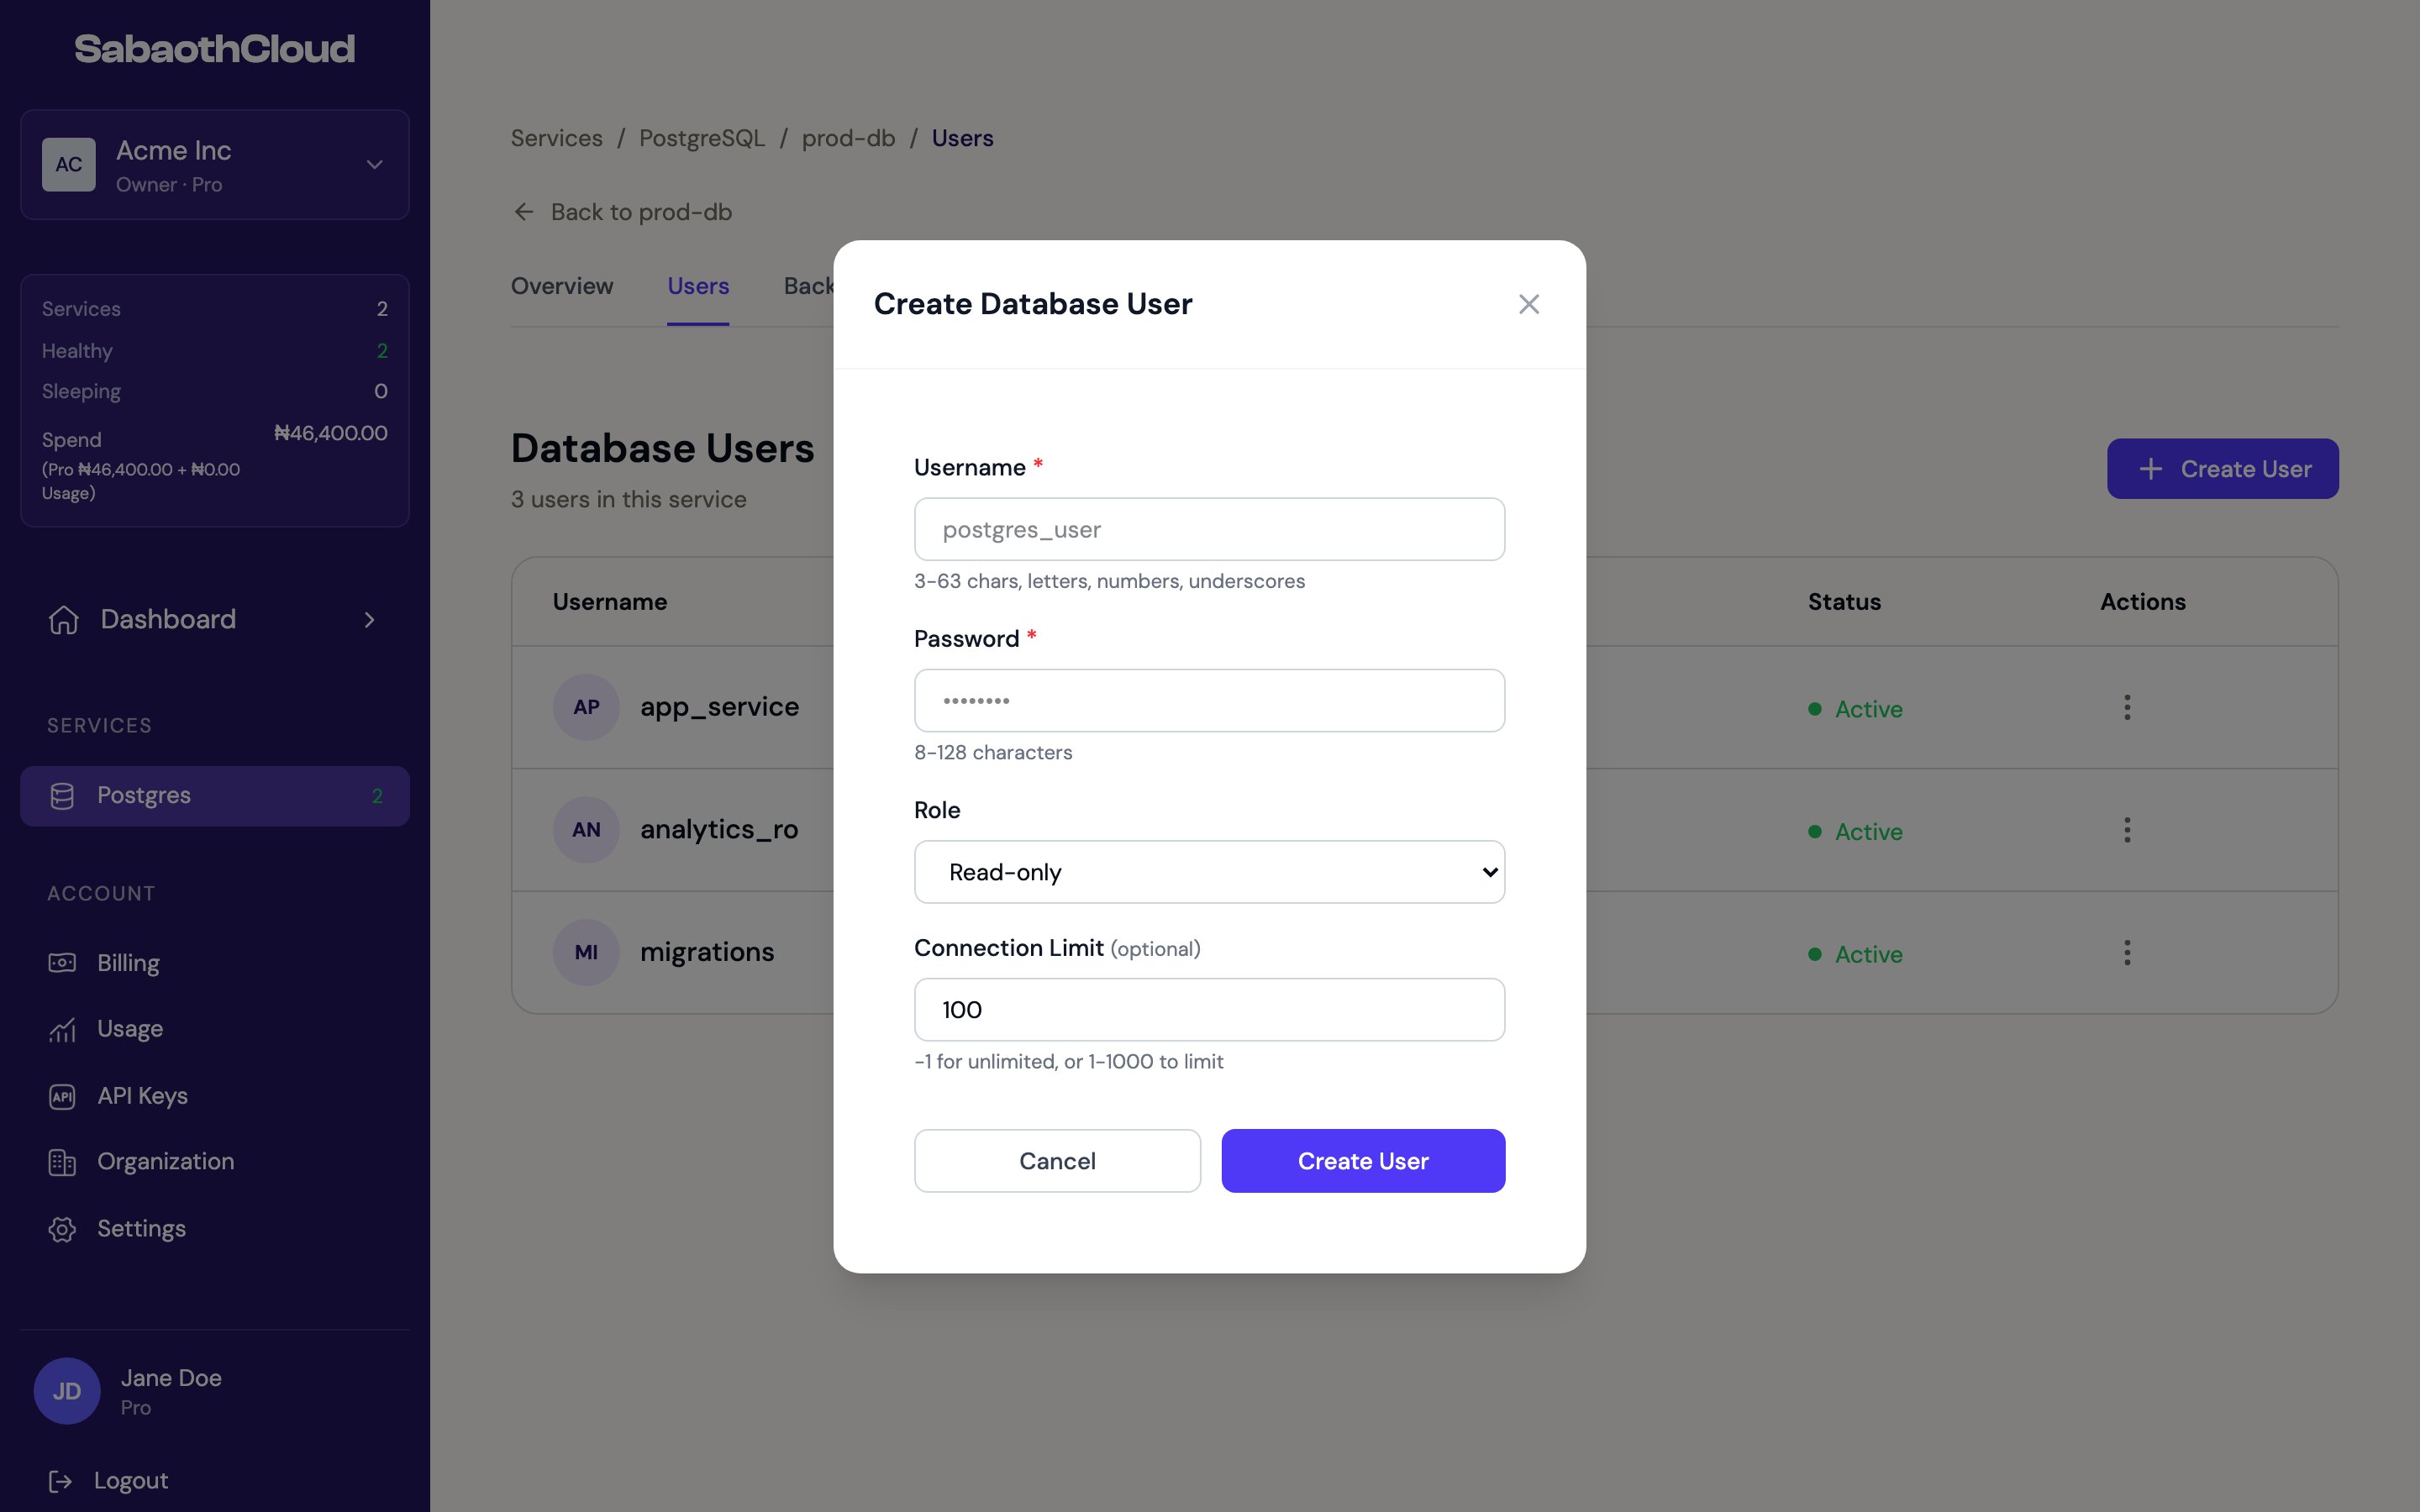
Create a user
- Click Create User.
- Enter a Username: 3 to 63 characters, starting with a letter, using letters, numbers and underscores. Reserved PostgreSQL role names and the service’s owner account can’t be used.
- Enter a Password of 8 to 128 characters.
- Choose a Role.
- Optionally set a Connection Limit:
-1for unlimited, or 1 to 1000. - Click Create User.
Edit a user
Click the menu next to a user and choose Edit Role & Connections to change the role or the connection limit, then click Save Changes.Rotate a password
- Click the menu next to a user and choose Rotate Password.
- Click Rotate Password to confirm.
- Copy the new password from the next screen.
Delete a user
Click the menu next to a user and choose Delete User, then confirm. Applications using that user can no longer connect.Users can be created and changed only while the service is Ready. Owners, Admins and Developers can manage users. Viewers can see the list.