Enable connection pooling
- Click Enable Connection Pooling.
- Choose a Pool Mode.
- Set the number of PgBouncer instances, from 1 to 3.
- Optionally set Max client connections (10 to 10,000, default 100) and Default pool size (1 to 1,000, default 20).
- Click Enable Pooling.
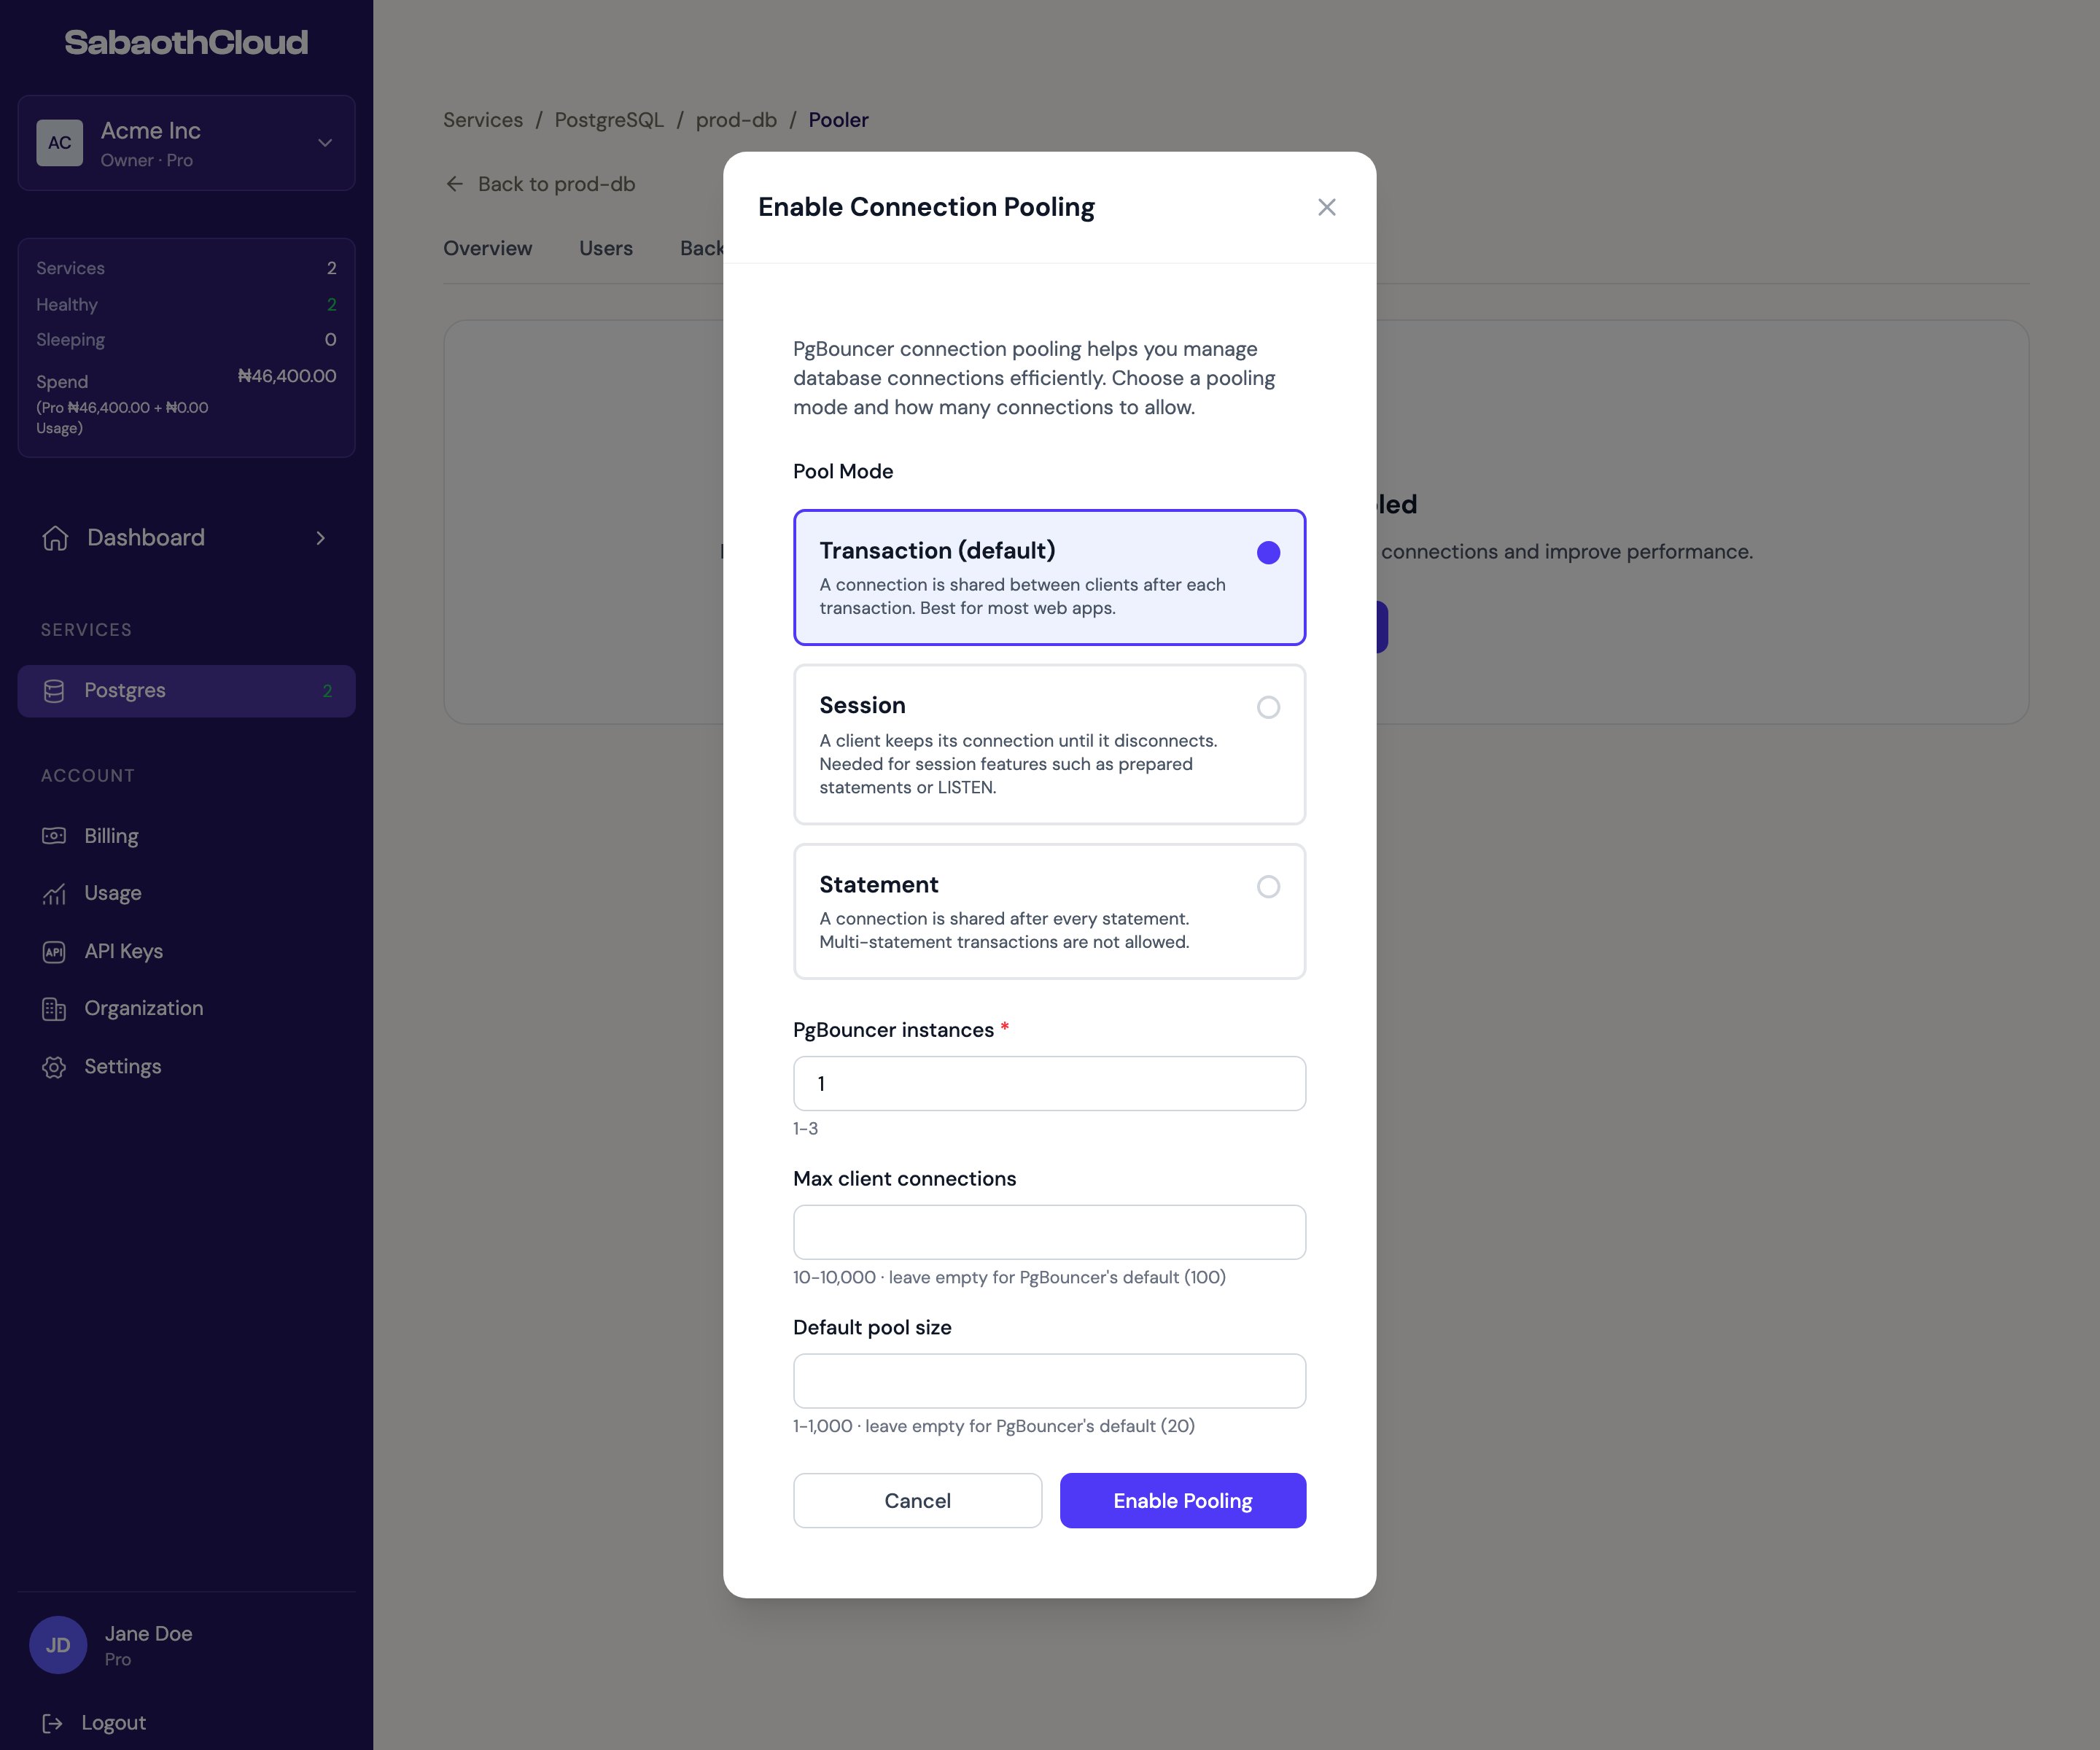
Pool modes
Setup usually takes under a minute. The page shows Connection Pooling Starting until every instance is ready.
Connect through the pooler
Once pooling is active, the Pooler tab shows the Endpoint and Port to use.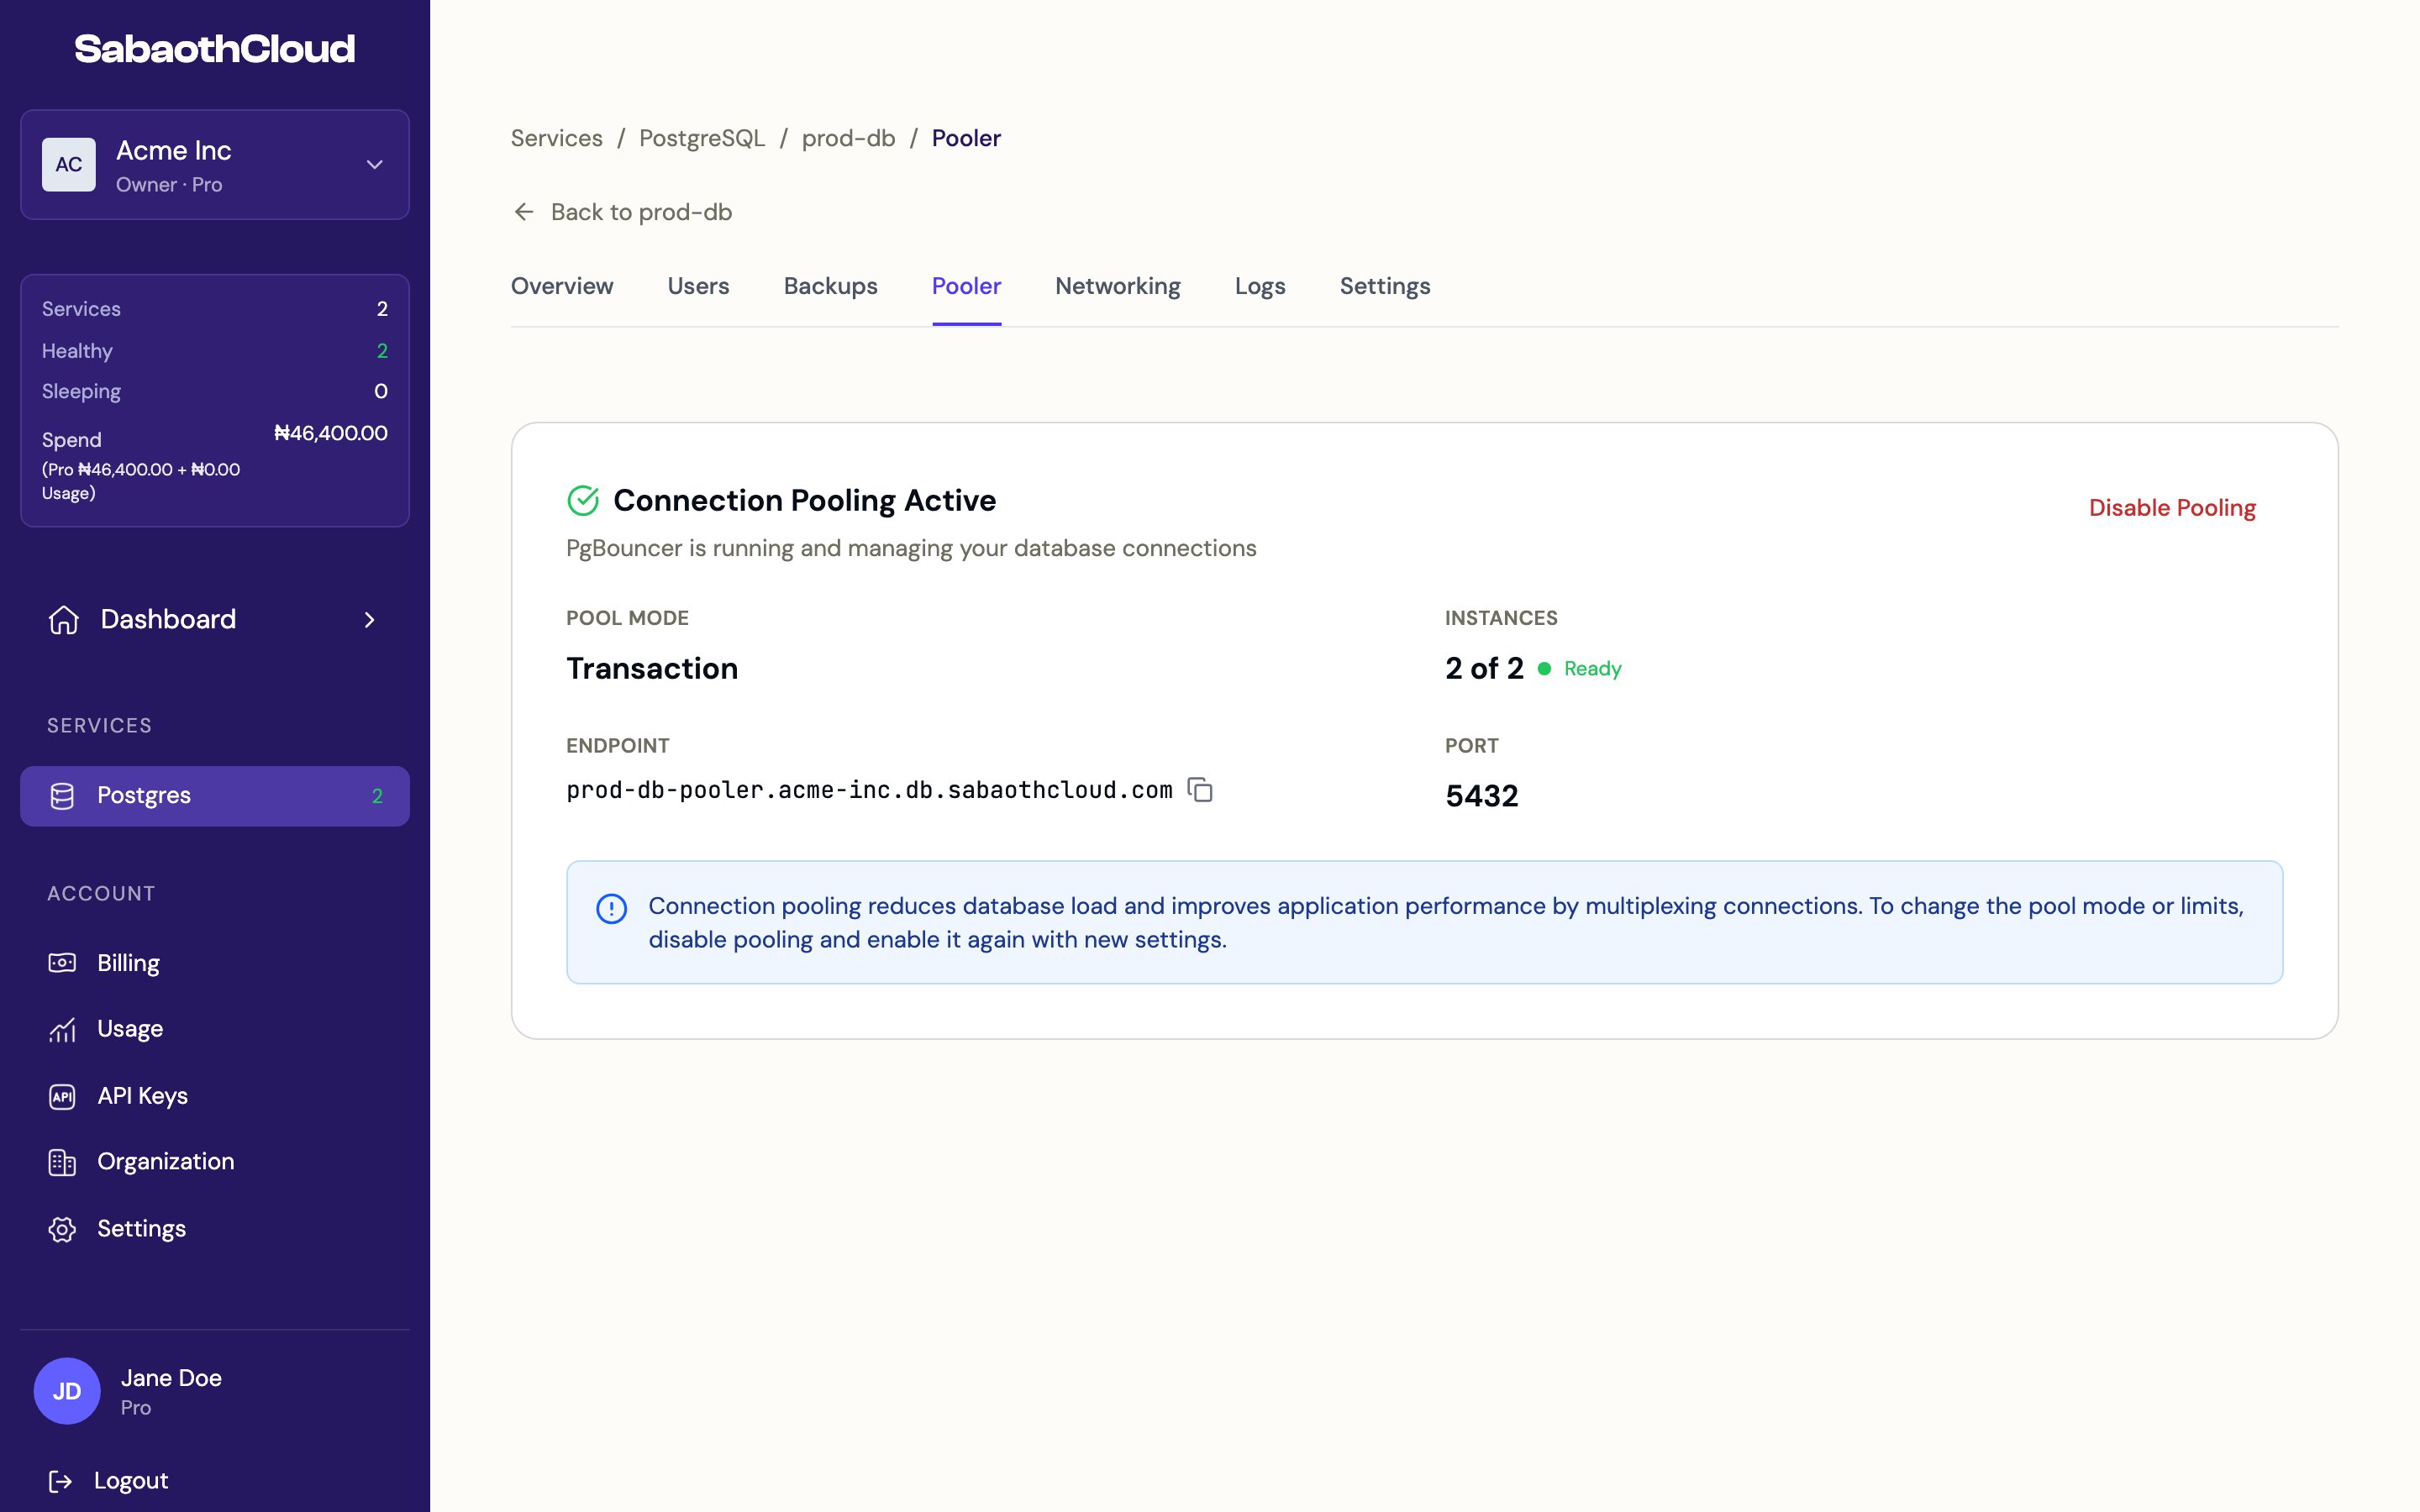
Change pooling settings
To change the pool mode or limits, click Disable Pooling, then enable it again with the new settings.Disable connection pooling
Click Disable Pooling and confirm. Applications connected through the pooler are disconnected, so switch them to the service host first.Pooling must be turned off before a service can be deleted. The delete dialog offers a Turn off pooling button for this.