> ## Documentation Index
> Fetch the complete documentation index at: https://docs.sabaothcloud.com/llms.txt
> Use this file to discover all available pages before exploring further.
# Quickstart
> Create a PostgreSQL service and connect to it in a few minutes
This guide takes you from a new account to a running PostgreSQL service you can connect to.
Create an account at [sabaothcloud.com/signup](https://sabaothcloud.com/signup). After signing up you are asked to choose a plan for your personal organization. You can pick one now or select **Skip for now** and do it later from **Billing**.
See [Signing up and signing in](/authentication) for details.
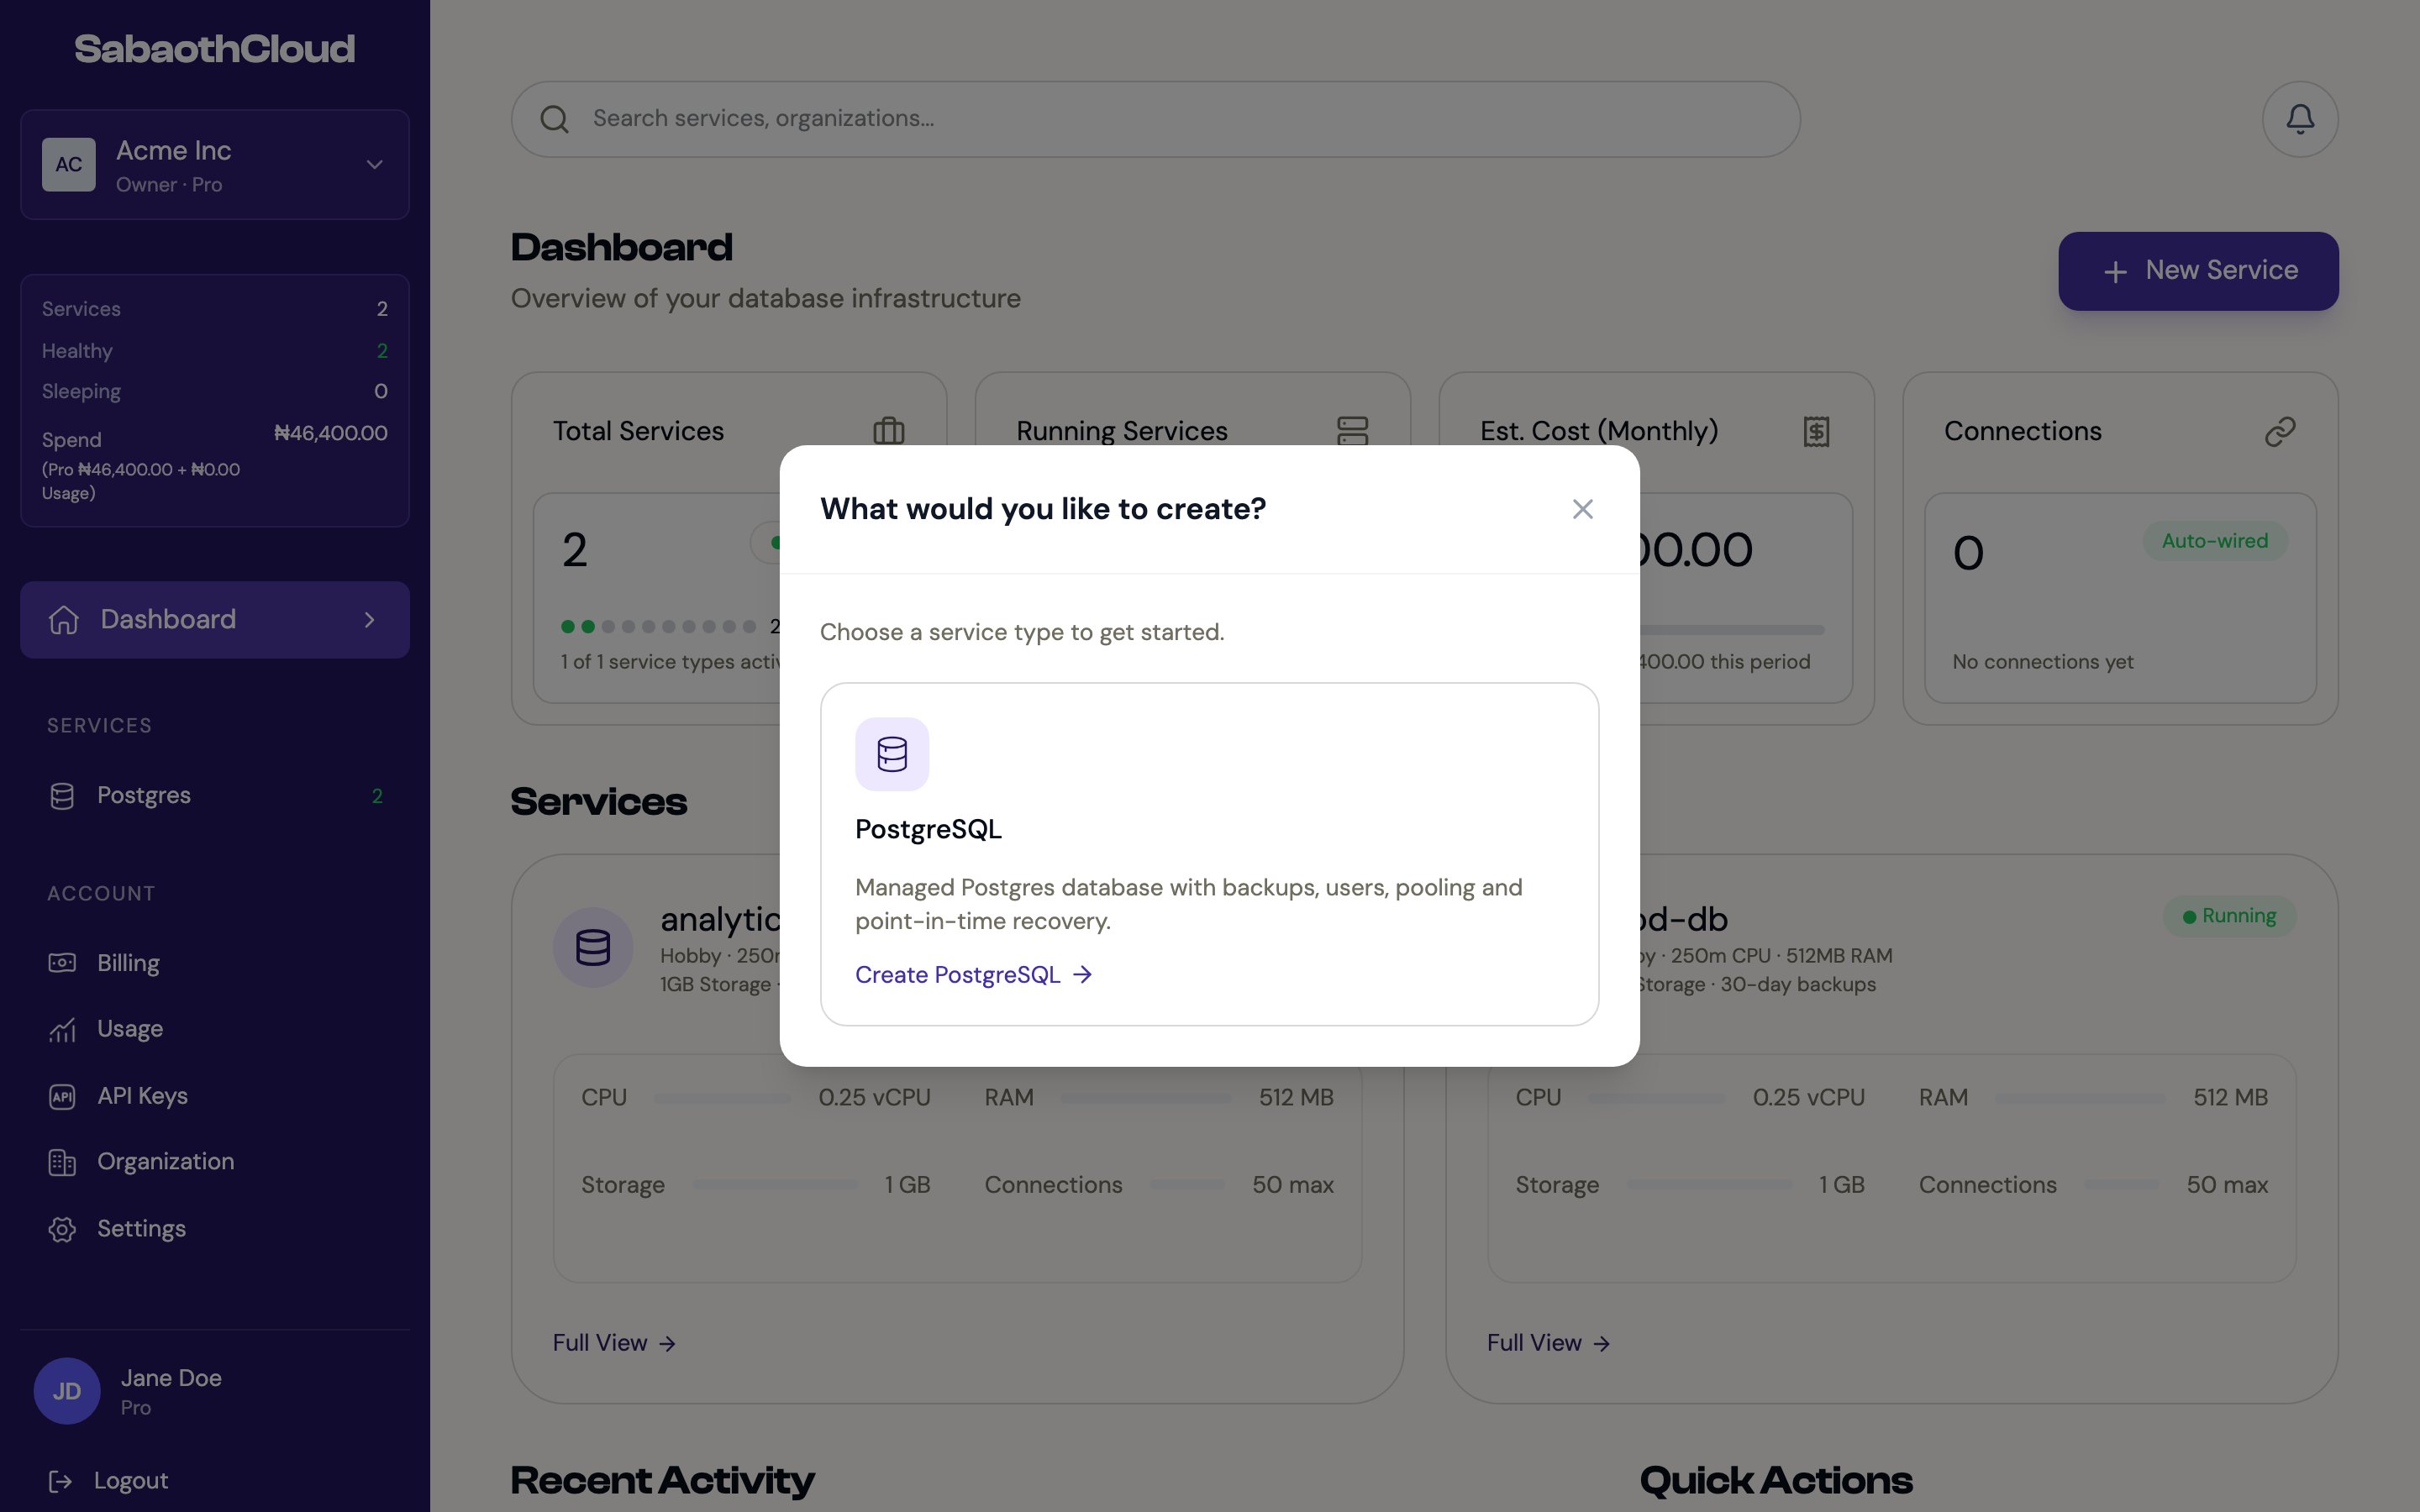
On the dashboard, click **New Service** and choose **PostgreSQL**.
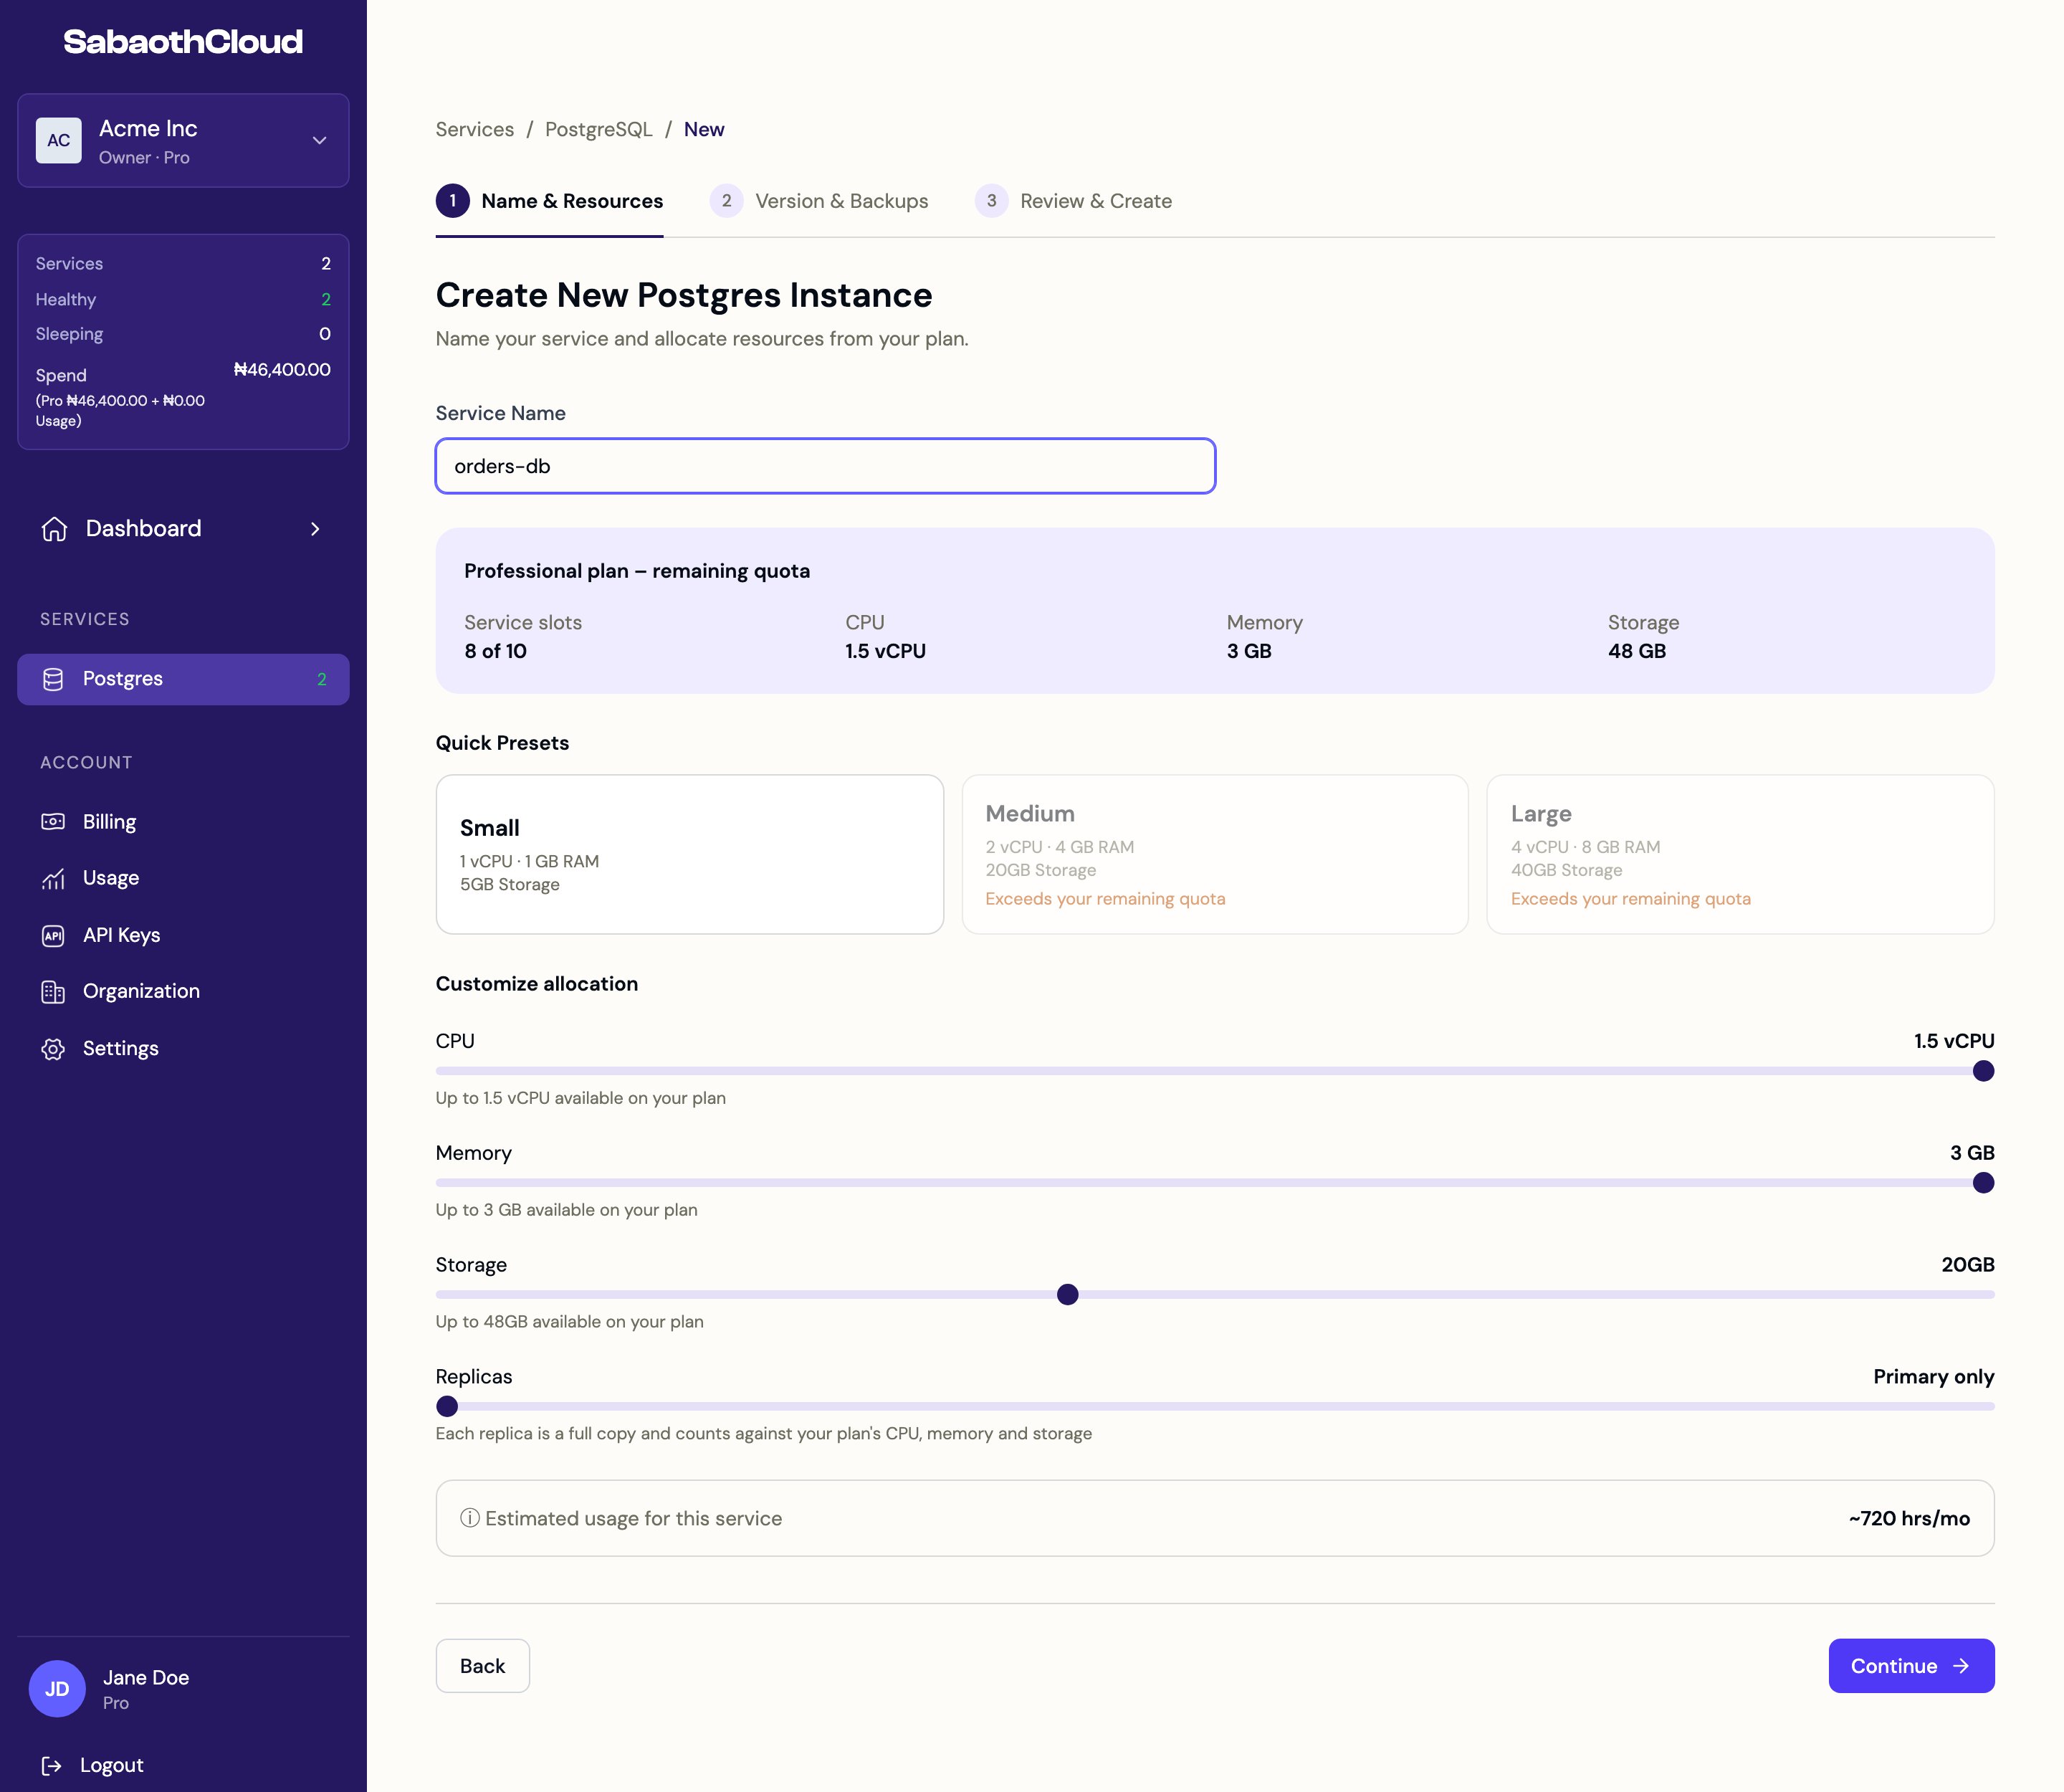
 Enter a **Service Name** such as `orders-db`, then choose a **Quick Preset** or adjust CPU, memory and storage with the sliders. The panel at the top shows how much of your plan is left.
 Keep the recommended PostgreSQL version unless you need another one. Automated backups are on by default.
Check the summary and click **Create Service**. The service shows **Provisioning** while it is set up, which usually takes a couple of minutes, then **Ready**.
Open the service, go to the **Users** tab and click **Create User**. Copy the password when it is shown, because it is displayed only once.
See [Database users](/dashboard/database-users).
Open the **Networking** tab to copy the host, port and database name, or a ready-made connection string. To connect from outside SabaothCloud, click **Expose to Internet** and add your IP address to the allowlist.
```bash theme={null}
psql "postgresql://app_service:YOUR_PASSWORD@HOST:5432/DATABASE?sslmode=require"
```
See [Networking and connecting](/dashboard/networking).
## Next steps
Check your backup schedule and learn how to restore.
Handle many short-lived connections efficiently.
Give teammates access with the right role.
Create an API key for scripts and CI pipelines.
This documentation is built and hosted on [Mintlify](https://mintlify.com), a developer documentation platform.
Keep the recommended PostgreSQL version unless you need another one. Automated backups are on by default.
Check the summary and click **Create Service**. The service shows **Provisioning** while it is set up, which usually takes a couple of minutes, then **Ready**.
Open the service, go to the **Users** tab and click **Create User**. Copy the password when it is shown, because it is displayed only once.
See [Database users](/dashboard/database-users).
Open the **Networking** tab to copy the host, port and database name, or a ready-made connection string. To connect from outside SabaothCloud, click **Expose to Internet** and add your IP address to the allowlist.
```bash theme={null}
psql "postgresql://app_service:YOUR_PASSWORD@HOST:5432/DATABASE?sslmode=require"
```
See [Networking and connecting](/dashboard/networking).
## Next steps
Check your backup schedule and learn how to restore.
Handle many short-lived connections efficiently.
Give teammates access with the right role.
Create an API key for scripts and CI pipelines.
This documentation is built and hosted on [Mintlify](https://mintlify.com), a developer documentation platform.