> ## Documentation Index
> Fetch the complete documentation index at: https://docs.sabaothcloud.com/llms.txt
> Use this file to discover all available pages before exploring further.
# Database Users
> Create PostgreSQL users with the right access, and rotate their passwords
Each service comes with an owner account. Create separate database users for your applications and teammates so each one has only the access it needs.
Open a service and go to the **Users** tab.
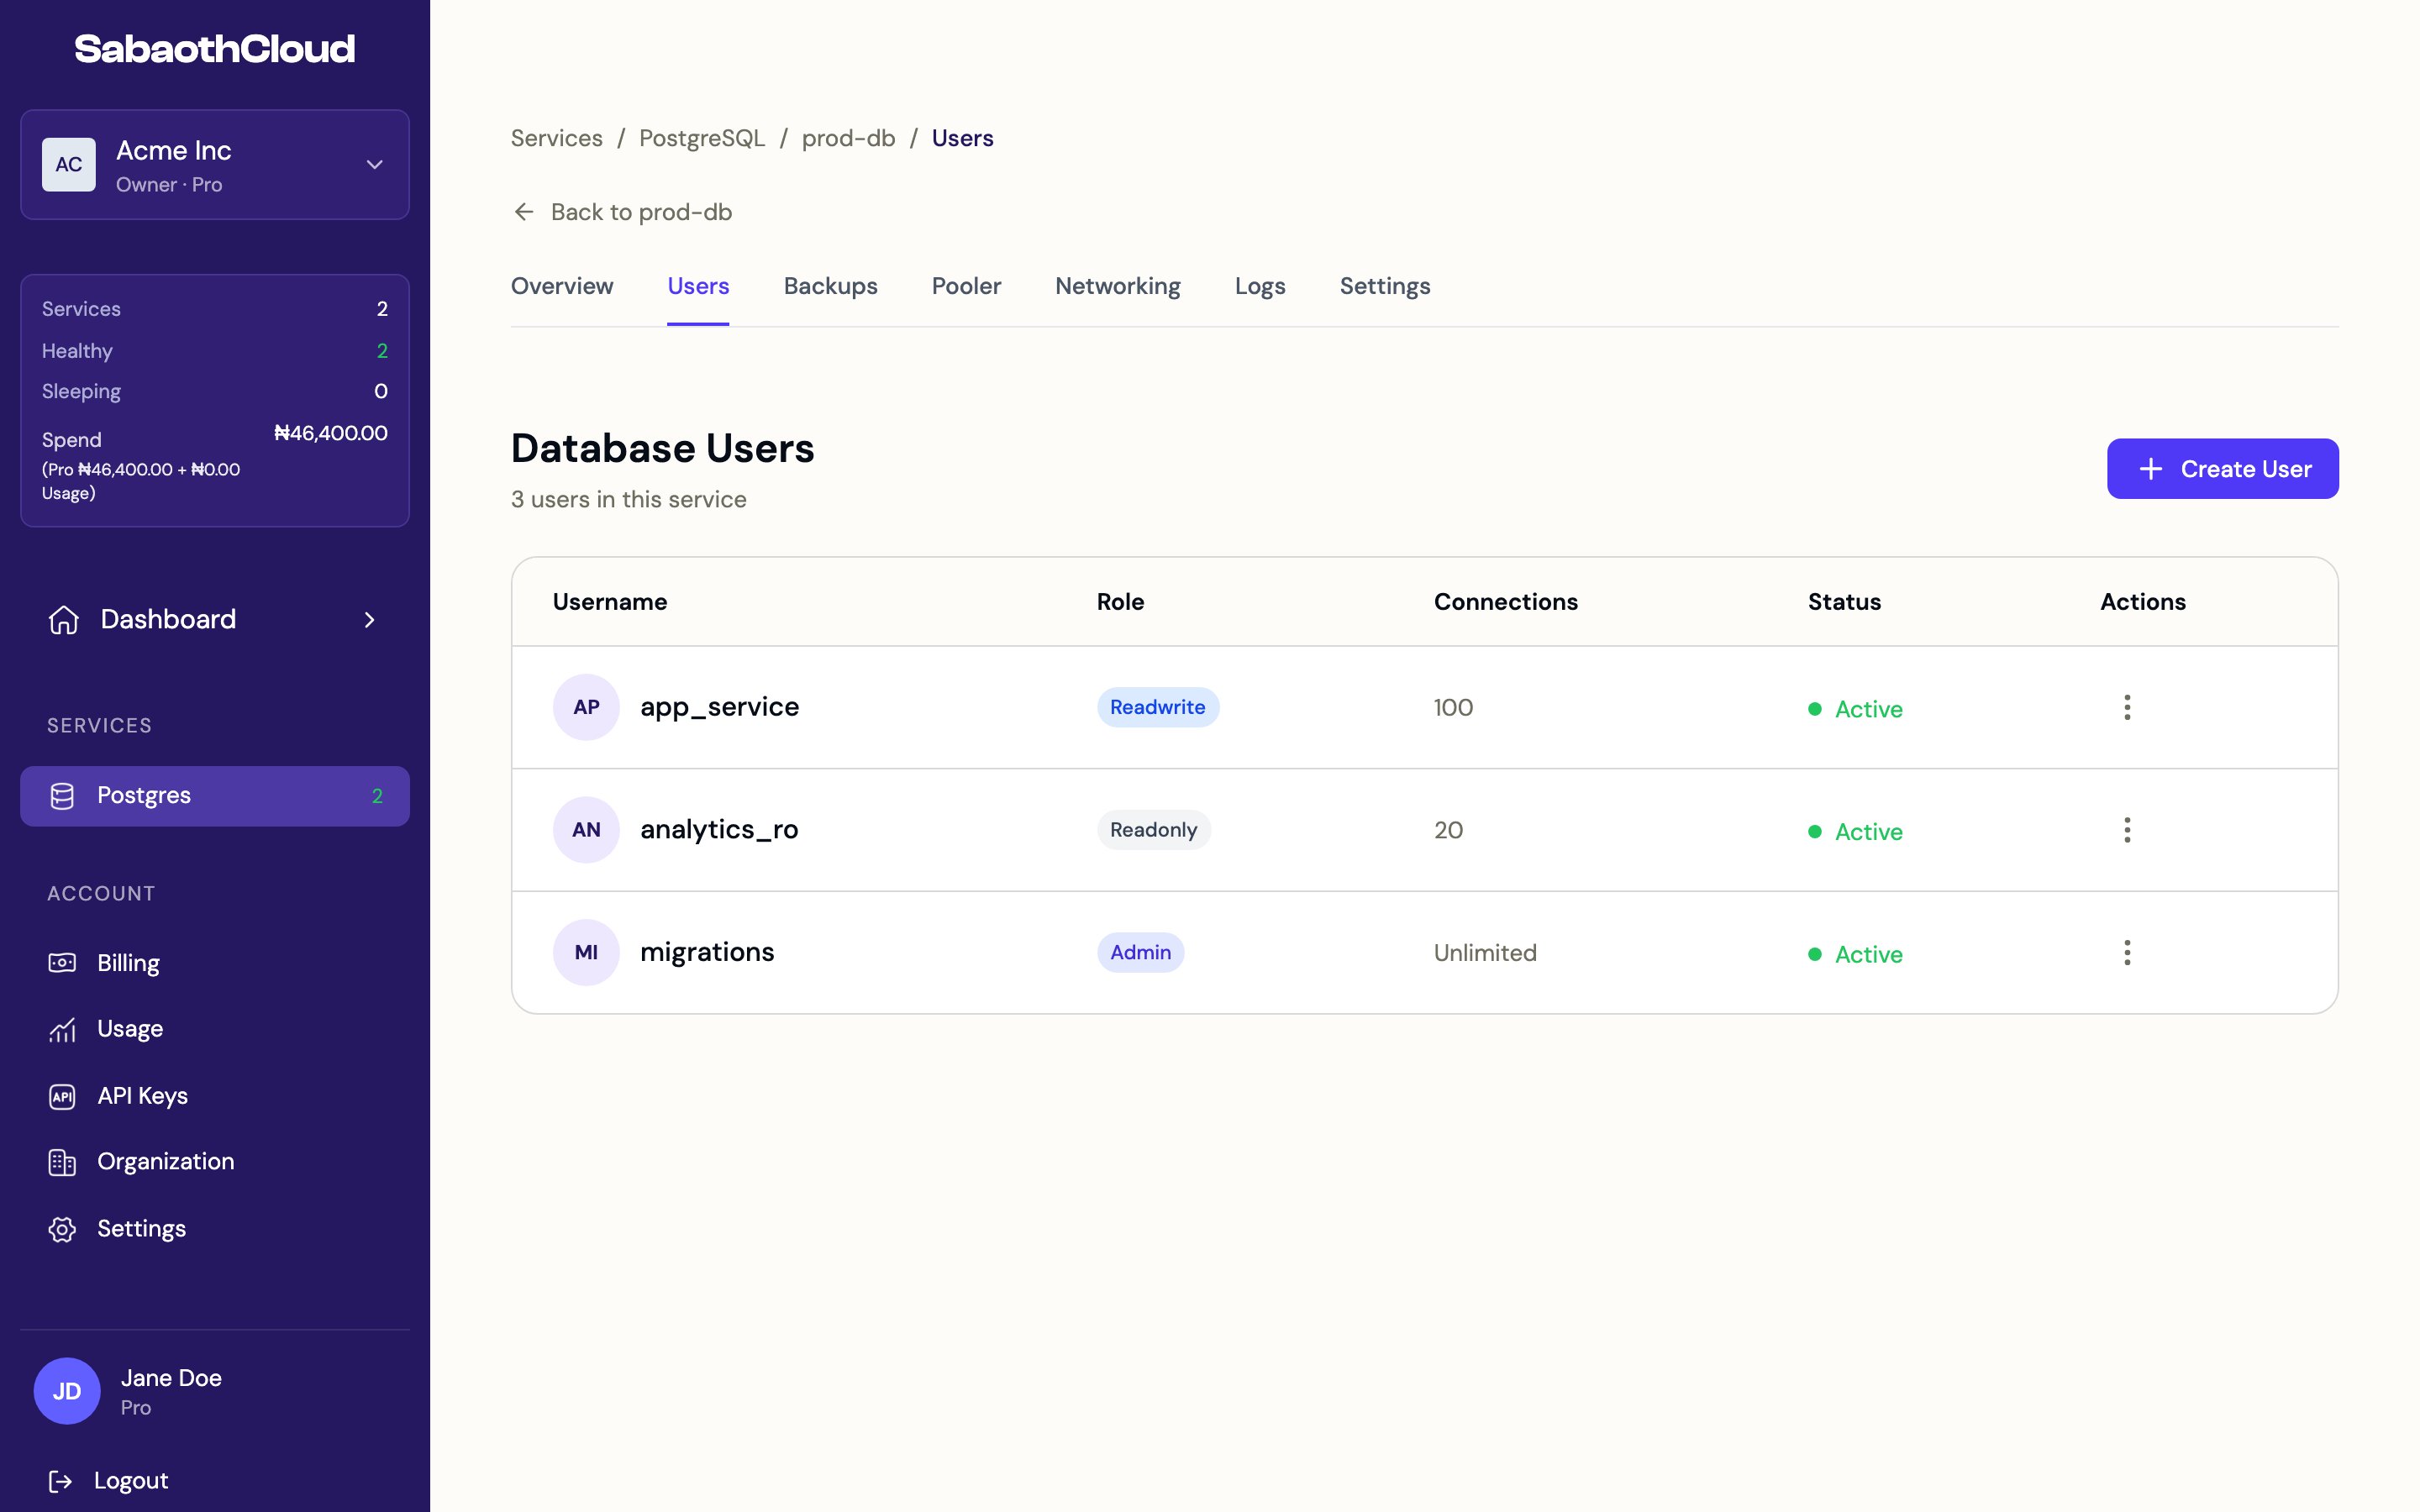 The table shows each user's **Role**, **Connections** limit and **Status**.
## Roles
| Role | Access |
| - | - |
| **Admin** | Full access to the database. |
| **Read/Write** | Read and change data. |
| **Read-only** | Read data only. |
## Create a user
1. Click **Create User**.
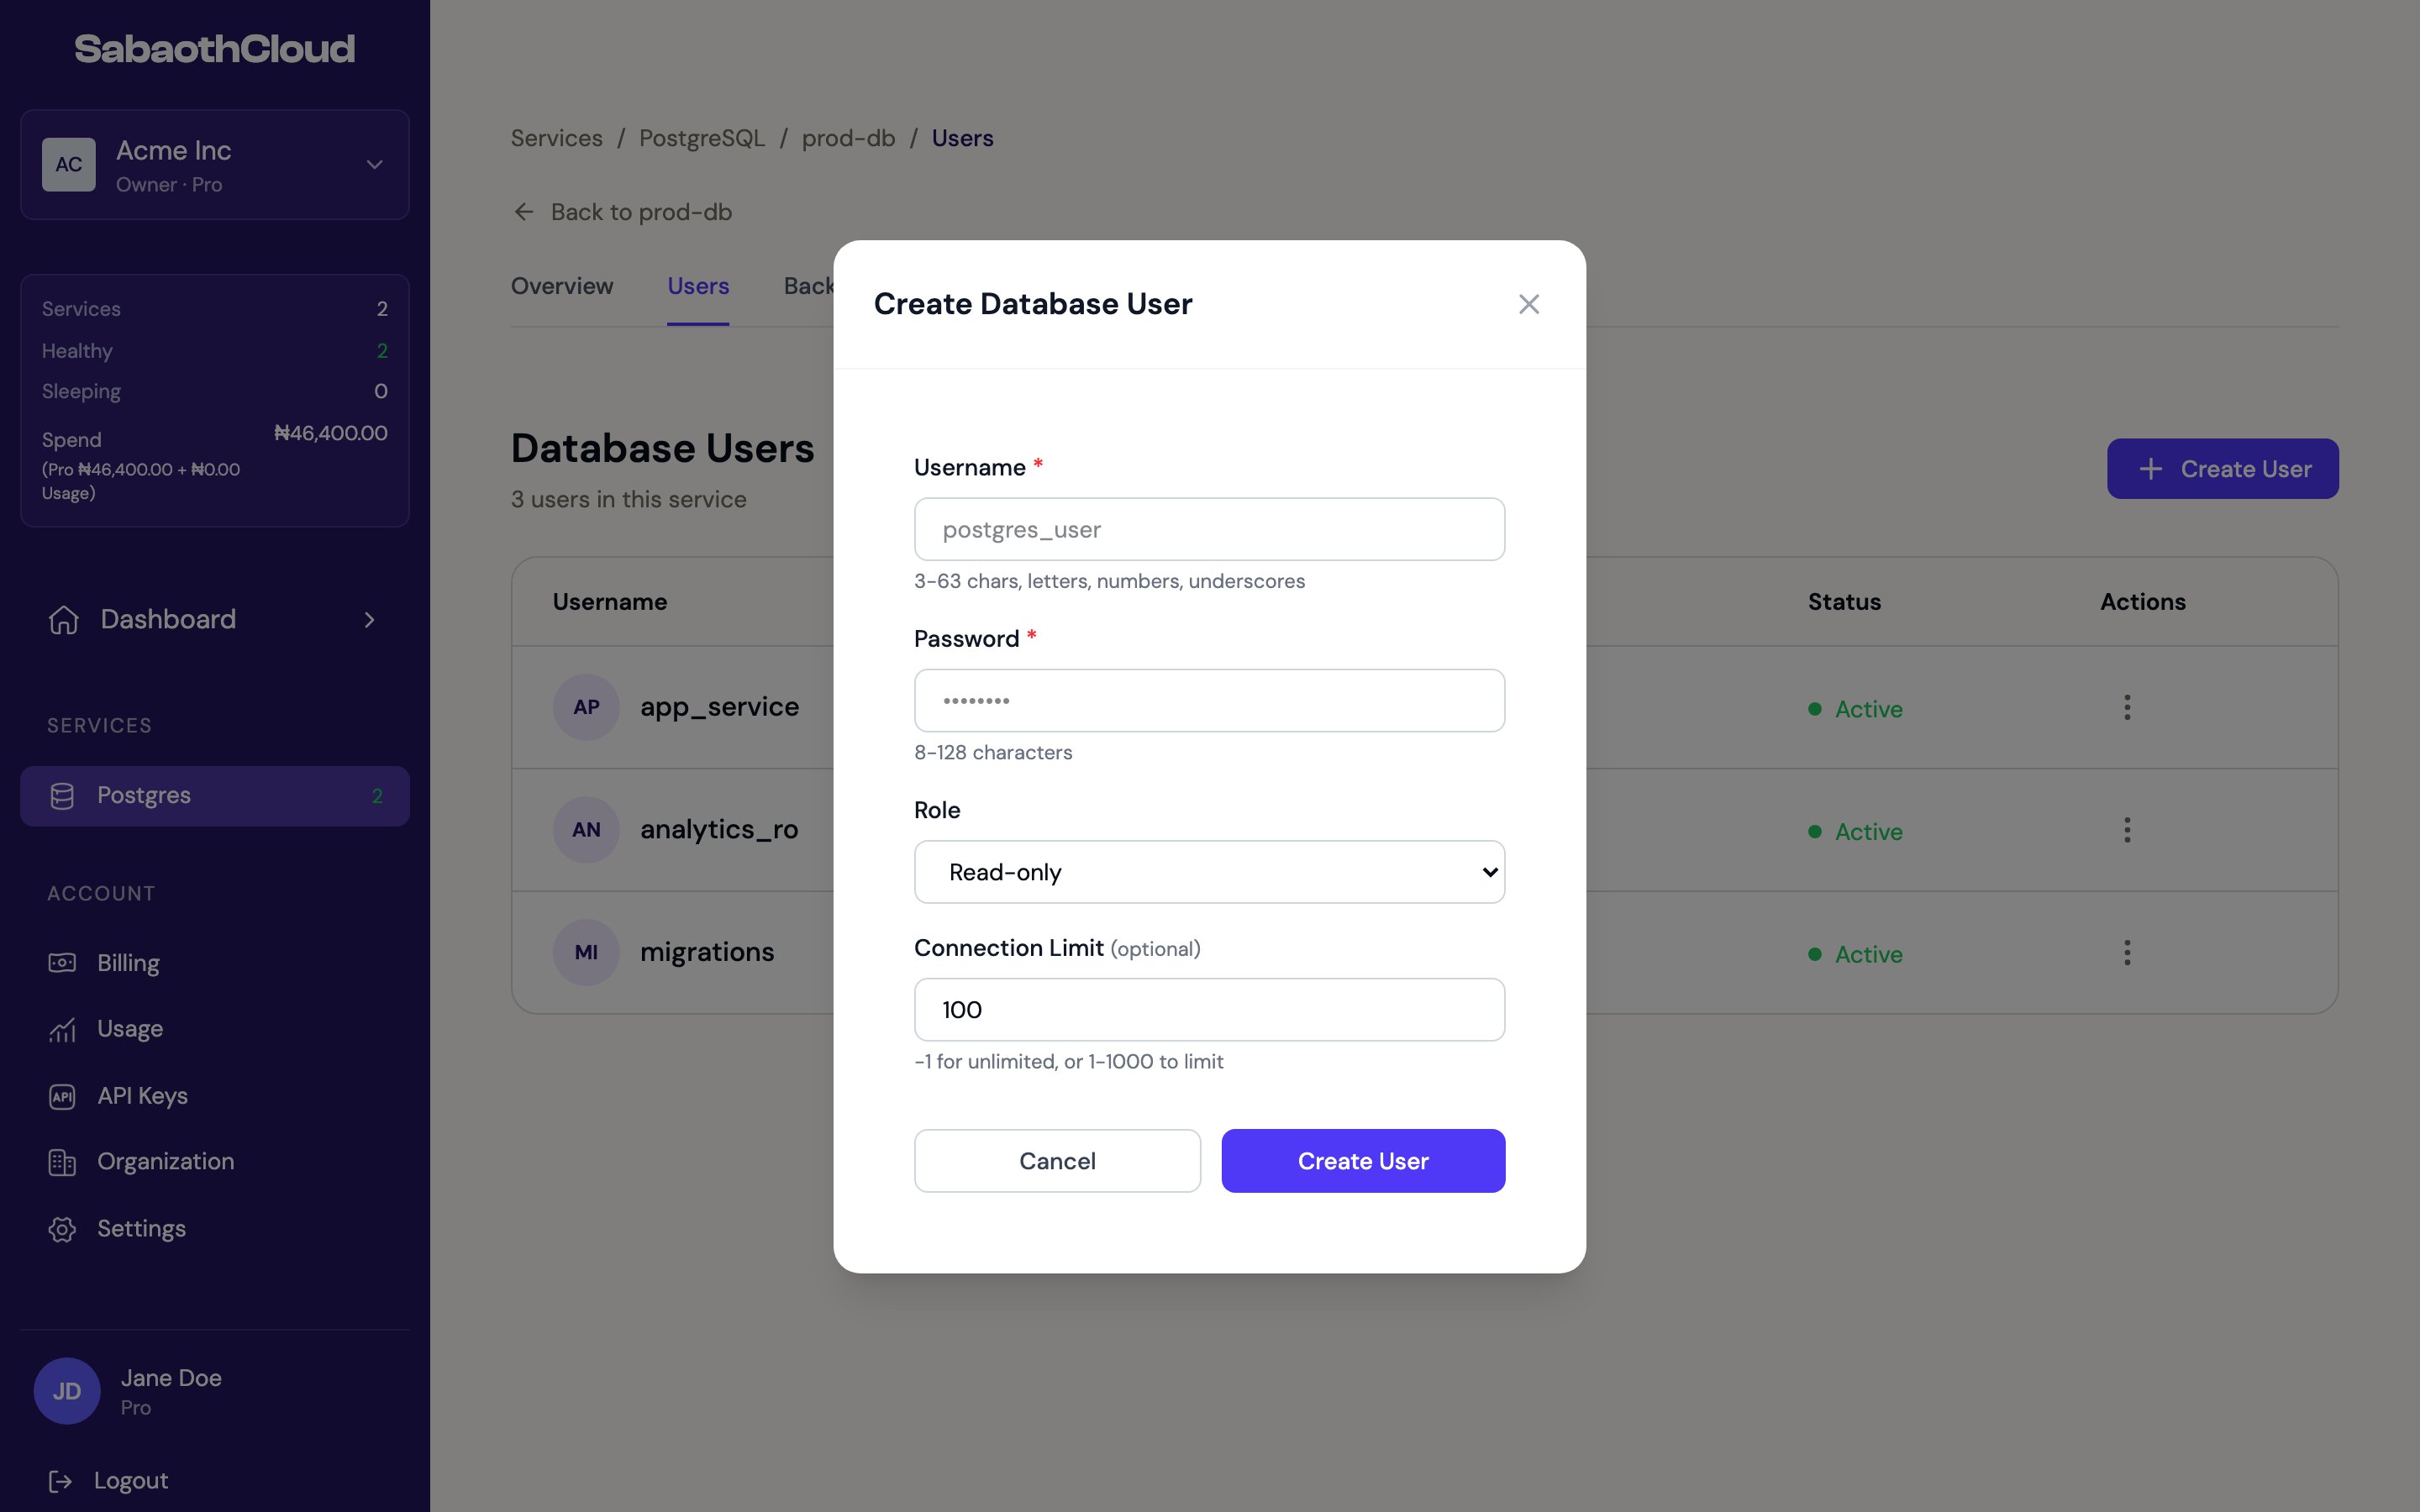
2. Enter a **Username**: 3 to 63 characters, starting with a letter, using letters, numbers and underscores. Reserved PostgreSQL role names and the service's owner account can't be used.
3. Enter a **Password** of 8 to 128 characters.
4. Choose a **Role**.
5. Optionally set a **Connection Limit**: `-1` for unlimited, or 1 to 1000.
6. Click **Create User**.
The table shows each user's **Role**, **Connections** limit and **Status**.
## Roles
| Role | Access |
| - | - |
| **Admin** | Full access to the database. |
| **Read/Write** | Read and change data. |
| **Read-only** | Read data only. |
## Create a user
1. Click **Create User**.
2. Enter a **Username**: 3 to 63 characters, starting with a letter, using letters, numbers and underscores. Reserved PostgreSQL role names and the service's owner account can't be used.
3. Enter a **Password** of 8 to 128 characters.
4. Choose a **Role**.
5. Optionally set a **Connection Limit**: `-1` for unlimited, or 1 to 1000.
6. Click **Create User**.
 The next screen shows the user's password and a ready-made connection string.
The password is shown only once. Copy it and store it somewhere safe, such as a secrets manager, before closing the dialog.
## Edit a user
Click the menu next to a user and choose **Edit Role & Connections** to change the role or the connection limit, then click **Save Changes**.
## Rotate a password
1. Click the menu next to a user and choose **Rotate Password**.
2. Click **Rotate Password** to confirm.
3. Copy the new password from the next screen.
The old password stops working immediately, so update your applications straight away.
## Delete a user
Click the menu next to a user and choose **Delete User**, then confirm. Applications using that user can no longer connect.
Users can be created and changed only while the service is **Ready**. Owners, Admins and Developers can manage users. Viewers can see the list.
This documentation is built and hosted on [Mintlify](https://mintlify.com), a developer documentation platform.
The next screen shows the user's password and a ready-made connection string.
The password is shown only once. Copy it and store it somewhere safe, such as a secrets manager, before closing the dialog.
## Edit a user
Click the menu next to a user and choose **Edit Role & Connections** to change the role or the connection limit, then click **Save Changes**.
## Rotate a password
1. Click the menu next to a user and choose **Rotate Password**.
2. Click **Rotate Password** to confirm.
3. Copy the new password from the next screen.
The old password stops working immediately, so update your applications straight away.
## Delete a user
Click the menu next to a user and choose **Delete User**, then confirm. Applications using that user can no longer connect.
Users can be created and changed only while the service is **Ready**. Owners, Admins and Developers can manage users. Viewers can see the list.
This documentation is built and hosted on [Mintlify](https://mintlify.com), a developer documentation platform.